Friday, 12 December 2014

Help ex - Jenna and Cedric

Jenna and Cedric, two young Canadians stayed for a week here in November.  They have taken a year out to travel around Europe and to visit ecological projects.  It was a pleasure to have them here and they brought a wealth of fantastic skills and knowledge.

In the Garden

Cedric digs a trench in preparation for
making a hugul bed
Cedric dug out a circular path ...
Layed down a landscape fabric ...
... and layed old broken slate tiles from the roof
of the house on top
Jenna raked up leaves to put  into
the hugulbed
Cedric collected rotting wood from the land
to put into the hugul trench
Jenna weeds the vegetable beds
before covering them in a light
blocking mulch of leaves
and straw
In the Kitchen

Both Jenna and Cedric are accomplished cooks.  They produced many declicious vegetarian meals using produce from the garden.

The dynamic duo creating in the kitchen
One of their fabulous meals
Jenna - always with a happy smile
Preparing to enjoy another tasty meal
Jenna made a delicious Borscht (beetroot soup) with
beetroots from the garden
 
Chopping firewood and lighting the woodstove
 
You can't stop a Canadian being a Canadian!  Home
from home - Cedric grew up on a farm and is
an expert in woodchopping.
 
Cedric demonstrates how to cut notches
in wood to make firelighters
Repairing Tools
 
Cedric fixed several broken tool handles
 
 
Relaxing in the evening
 

Jenna explained some of the aps she has on her iphone - 
for example 'ciri' who answers any questions asked verbally!! ...
 while Cedric learns a new song
Bon Voyage

Jenna and Cedric set off for Bordeaux


Tuesday, 11 November 2014

Inspirational projects: Association 'Eau Vivante'

Earlier this year I spent a week at the Headquarters of the Association 'Eau Vivante'.  It was a little research mission to learn as much as possible about possible grey water systems for La Mariais.  I had heard about them some years back and had helped to install one of their three basin volcanic rock reed bed systems here in Normandy.  Grey water is the water that comes from the sinks, baths, shower and washing machine (any water that hasn't come from a flush toilet).

The Association was set up by a woman called Anne Riviere who has studied environmental science to PhD level and who has conceived a reed bed system for grey water evacuation as a complement to the use of dry toilets.

I had already made enquiries with the local government SPANC service as to what were the legal options .... in fact there is no legal system for a grey water system combined with dry toilets.  I had also made enquiries with a company called Aquatiris who suggested putting in an illegal and hugely expensive  grey water reed bed system.  I then read a book called 'Create an Oasis with Greywater' by Art Ludwig that suggested (amongst many options) a collection plumbing system for all the grey water that could then be piped to a pit filled with wood chip with a tree planted in the middle.  It was, in fact, this system that I have now installed - the associates of Eau Vivante were over the moon to discover the above mentioned book and felt that this option would be the best one for me especially since the cost compared to any other option was derisory (the cost of a bag of cement for the regard, some PVC pipe, half a metre squared of wood chip and a pear tree).

Some images from my week at Eau Vivante:

The Grey Water Reed Bed System:

 
Every year the plants in the reed bed system
need thinning out and replanting

Collecting seaweed from the Beach for use as fertiliser in the garden vegetable and fruit beds:


Creating Hugulbeds with rotting wood from a local forest and the seaweed:

A trench was dug and filled with
smashed up rotting wood which
will act as a slow release fertiliser
as well as a 'sponge' to hold water


The finished hugulbed with seaweed on the top


Collecting and Drying Edible Seaweed from the Local Beach:

The seaweed is prised off the rock


Washing the sand and grit out
of the seaweed
We laid the seaweed out in the
sun to dry

The Dry Toilet - from the back, the front and the inside:


A mini grey water system from the caravan - plastic buckets filled with volcanic rock


The Norwegian cooker - a wooden box insulated with recycled polystyrene.  Food that has started cooking can be left to slowly continue in the insulated box hence saving energy.


woolly jumpers placed on top help to keep the food
cooking

A solar cooker made with recycled materials:

Pine Trunks felled on the land are used to create raised beds:

Wednesday, 22 October 2014

Tackling the garden

Indi heroically spent a few days recently tidying up the wild but productive potager, much of which has been created with hugulkultur.  This year we have had beans, marrows and courgettes, salads and herbs, cabbages, chard, beetroot, carrots, pumpkins, potatoes .....
 
The idea is to create a no dig/no weeding system - putting down mulch (grass/nettle/fern cuttings, weeds, manure) onto raised or hugulbeds.  Eventually I would like to plant more perennial vegetables.
 
Indi at work:


The torchis chimney (cheminee en torchis)

I was told over and over by a series of artisans that the wooden/earth chimney in the house would have to go as it was not 'au normes' - dangerous .... so after chipping off the earth around the wooden framework, we set to dismanting the wooden structure after which a wood burning stove with an insulated flue pipe was fitted by an artisan as part of the grant I received for the house.
 
Some images of the process:
 
The wooden framework of the
upper part of the chimney once
the earth had been chipped off
 
 
Fabrice helps to carefully take
down the wooden chimney
 
 
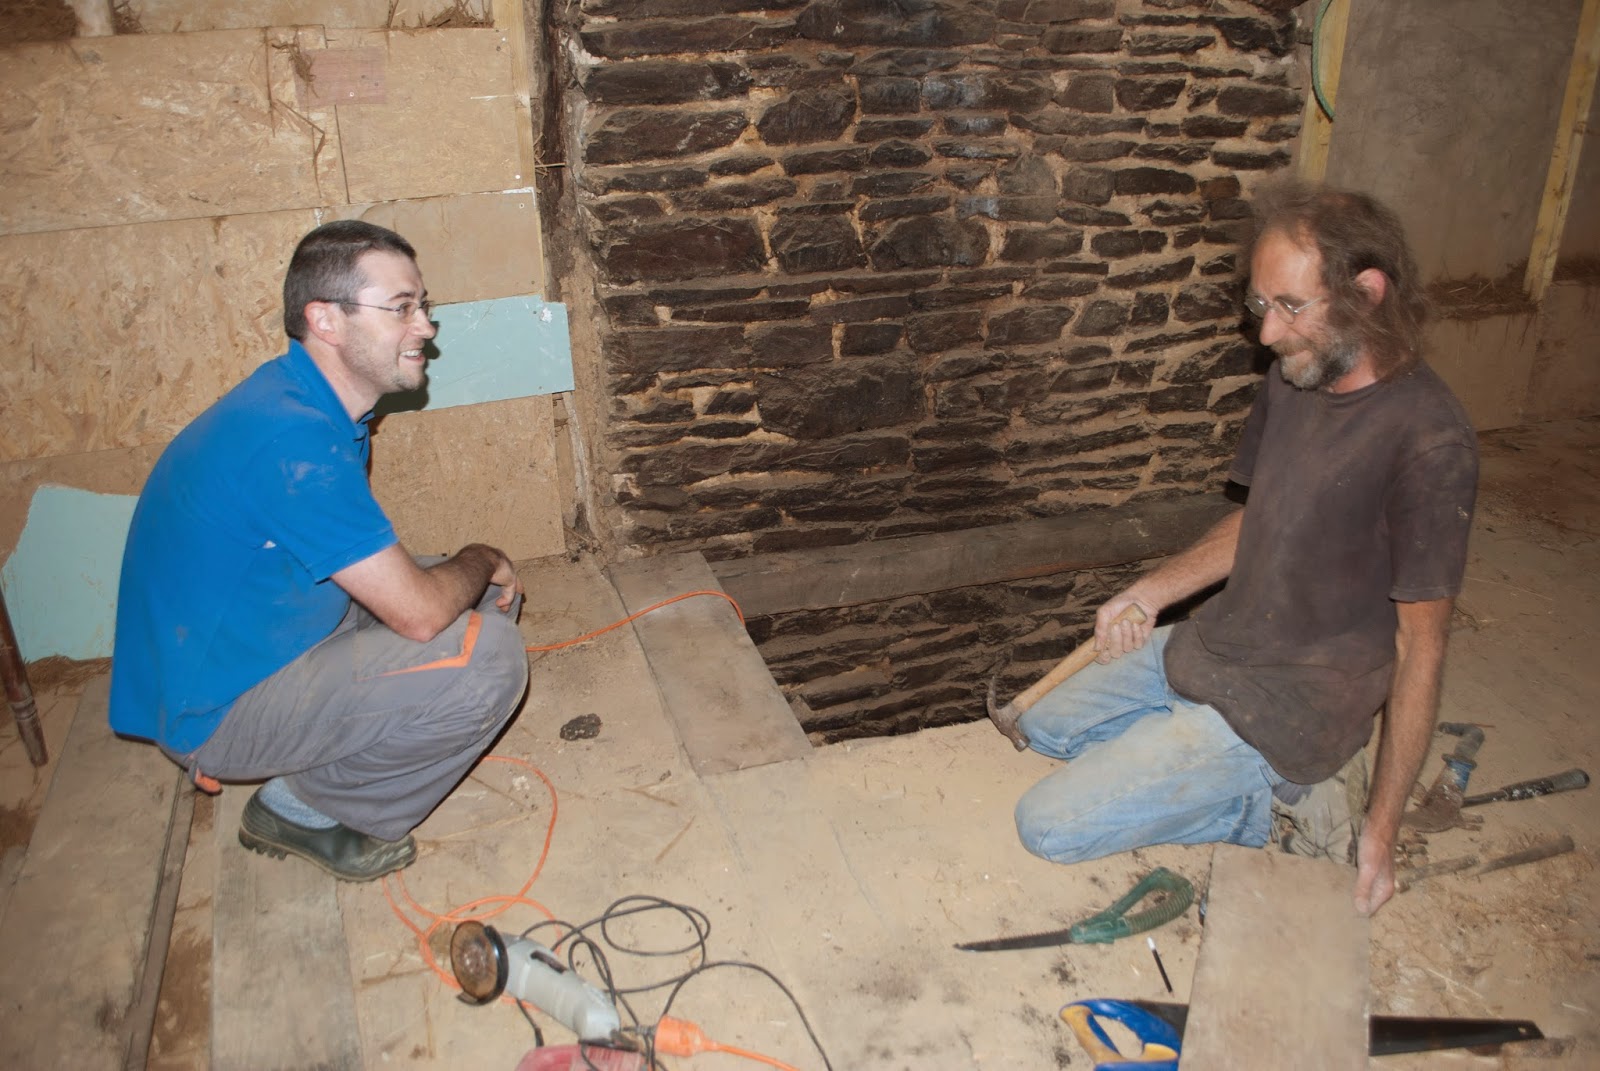
Xavier and John adding planks to the hole in the floor
 
I cleaned the stones up as best I could with wire
brushes and a range of different products after
which I rendered over the top with NHL
3,5 lime and 0:2 sand and brushed this off
several days later to give the 'pierre vue' effect
(seen below)


Charlie and kevin heroically move the hearth  stones
forward to accommodate the wood stove
 
Kevin sands the beam above the fireplace
 
The woodburning stove arrives


External lime render (enduit chaux exterieur)

Although possibly a little late in the season, I have decided to start rendering the external torchis as it will need protecting for the winter, especially the South wall which seems to be particularly affected by heavy rain in the winter months.  Due to a lack of time to experiment, I have decided on a recipe based on the Eyrolles book 'Torchis' as well as on a conversation with an artisan who studied at the Avignon school of rendering.  Ideally I would have done extensive patch tests with different mixes.  The artisan advised me not to include fibres in the mix (contrary to the book) and to use dried and finely filtered clay earth to substitute for a third of the 0/2 sand (in this case sable de Bayeux).   I have decided to use more lime than normal due to the lateness in the year.
 
The idea is to use a mixture of lime - Chaux CL (chaux aerienne) on its own would take too long to dry and would wash off in the rain ... however it is the most supple and breathable of the limes hence good to put on to an earth wall.  The chaux NHL2 is the most supple and breathable of the NHL limes but hardens on contact with water so it will allow the mix to dry more quickly and give a more resistant surface ...
 
So the recipe:
 
Lime paint (badigeon) applied to torchis: 50% volume NHL3,5 and 50% water
 
Lime render:  One volume of sand/earth to two volumes of lime
 
The lime mix: 50% NHL2 and 50% chaux aerienne (CL)
The earth sand mix:   2/3 Sable de Bayeux 1/3 dried and finely sieved clay earth
 
The process:


The clay earth is dried out on old windows
Kevin filters the dried clay earth in a 1mm sieve. 
This is mixed with the sand and then left to soak for 24
hours


I scrape off any loose earth and
high areas


I paint on a mixture of 50% volume
 of chaux NHL 3,5 (lime NHL) and 50%
water which provides the 'glue' between
the torchis and the render.


The limes were mixed in the concrete
mixer and the soaked sand and earth
added to this.  I then applied this mixture
directly to the lime painted torchis wall. 
It is always a good idea to protect the wall
with a plastic sheet (against the sun, rain
and cold)